Skip to content
The concept of digital fabrication—turning a virtual design into a physical object on your kitchen table—once belonged solely to science fiction. Today, the 3D Printer has made this power accessible, affordable, and incredibly practical for home users. No longer just a toy for engineers, a modern 3D Printer is a versatile tool that allows you to fix a broken appliance, create custom organizers, invent new gadgets, and unleash unparalleled creative potential.
This comprehensive beginner’s guide will demystify the world of additive manufacturing, walking you through choosing your first machine, understanding the essential software, and successfully completing your first print. If you’re ready to join the global maker movement, read on—your journey starts here!
Table of Contents
🛠️ Why Buy a 3D Printer for Home Use?
The utility of having a personal fabrication tool cannot be overstated. Owning a 3D Printer transcends merely producing novelty items; it’s a tool for problem-solving and self-sufficiency.
Customization and Repair: The Core Value
The single biggest advantage of a home 3D Printer is the ability to create customized solutions and replacement parts on demand.
- Repair, Not Replace: Is the plastic hinge on your dishwasher broken? Did a small, irreplaceable gear snap inside your beloved coffee maker? Instead of throwing away the entire appliance, you can often download or design the exact replacement part and print it in a few hours. This ability to print spare parts can save significant money and reduce household waste.
- Hyper-Personalization: You can design a phone case with your initials, a custom-sized dock for a specific tool, or organizers perfectly tailored to the oddly shaped drawers in your home. The freedom to design and print personalized items is something traditional manufacturing cannot offer. For deeper insights into leveraging this customization for smart home automation, check out our guide on designing custom smart home mounts.
Education, Hobby, and Side Hustle
Beyond utility, the 3D Printer opens doors to new hobbies and educational opportunities:
- STEM Education: For families, a 3D Printer is a fantastic hands-on tool for teaching children principles of design, physics, and engineering (Source: Medium). Watching an object materialize from code provides an immediate, tangible understanding of technology.
- Creative Outlet: Whether you’re a tabletop gamer needing custom miniatures, a cosplayer printing armor pieces, or a jeweler designing bespoke molds, the 3D Printer is an unparalleled creative tool.
- Eco-Friendly Manufacturing: By printing on demand, you minimize material waste compared to subtractive (cutting) manufacturing. Furthermore, many materials like PLA (Polylactic Acid) are derived from renewable resources like corn starch, offering an environmentally conscious choice (Source: TWI Global).
⚙️ Choosing Your First 3D Printer: FDM vs. Resin
When starting out, you’ll encounter two primary types of consumer-level 3D printing technology, each with pros and cons: FDM and Resin (SLA/DLP).
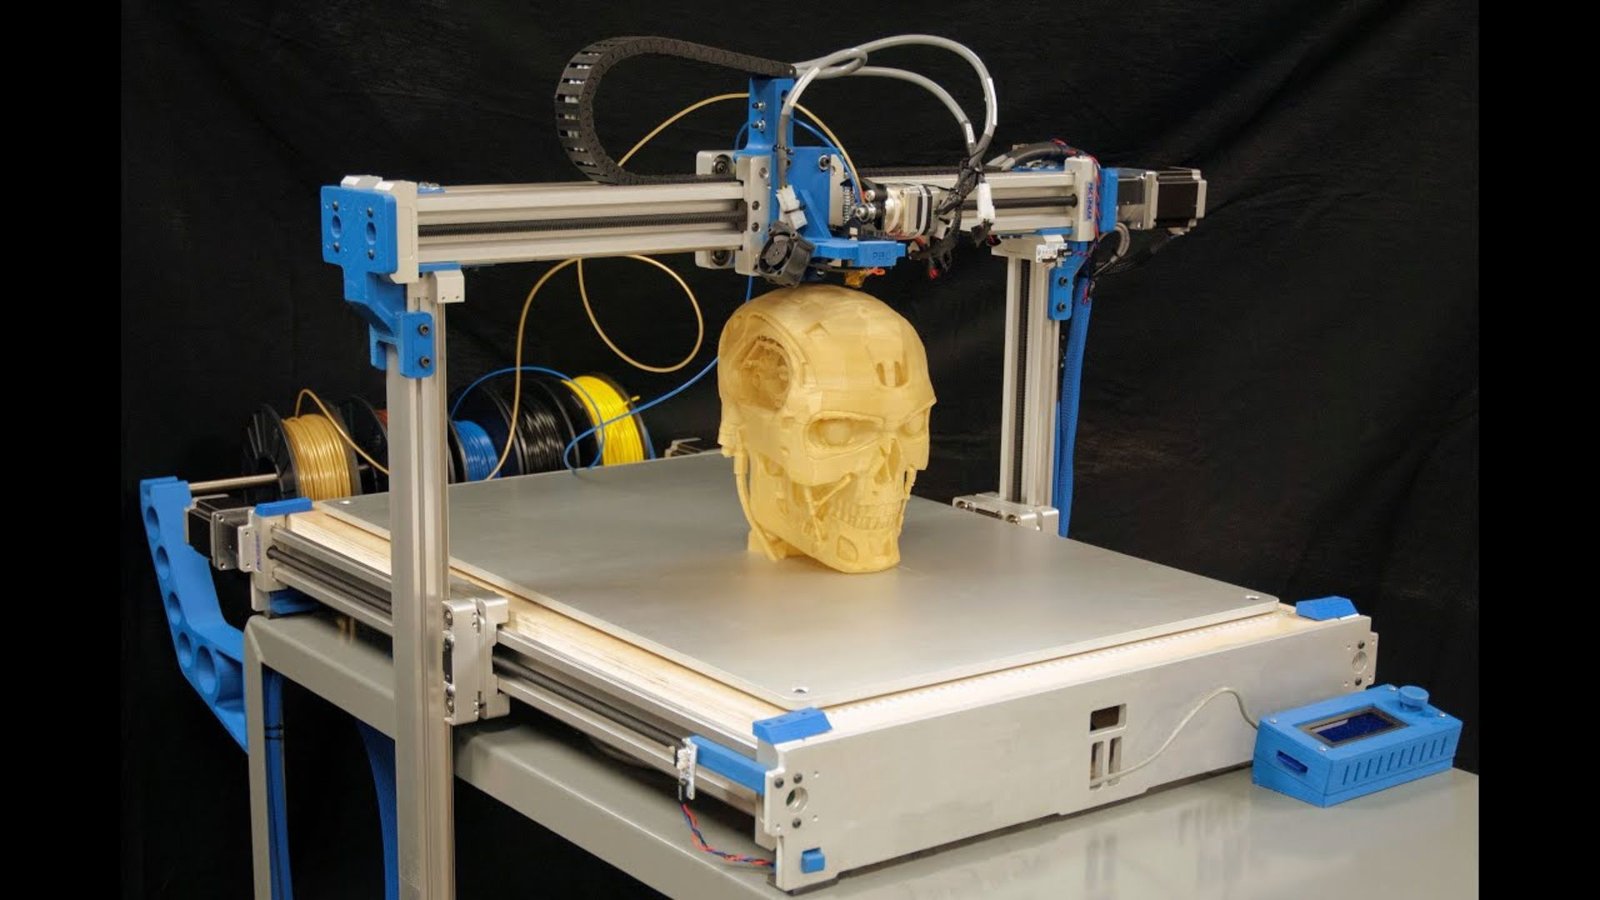
1. FDM (Fused Deposition Modeling)
FDM is the most common and beginner-friendly type of 3D Printer. It works by melting a plastic filament and extruding it layer-by-layer through a heated nozzle onto a build plate.
| Feature | Description |
| Material | Plastic Filament (PLA, PETG, ABS, TPU, etc.) |
| Cost | Affordable (Entry-level: £150-£400) |
| Ease of Use | High. Low maintenance, minimal post-processing. |
| Print Quality | Good. Visible layer lines; better for functional parts. |
| Recommended Models for Beginners | Bambu Lab A1 Mini, Creality Ender 3 V3 SE, Elegoo Centauri Carbon (Source: Tom’s Hardware, All3DP). |
Why choose FDM? It’s cheaper, safer, less messy, and uses durable materials ideal for functional prints like tools, brackets, and toys. It is the overwhelming favorite for a first 3D Printer.
2. Resin (SLA/DLP/LCD)
Resin printers use a UV laser (SLA) or UV light array (DLP/LCD) to cure liquid resin, hardening it layer-by-layer.
| Feature | Description |
| Material | Liquid Resin (requires gloves and ventilation) |
| Cost | Moderate (Entry-level: £100-£300) |
| Ease of Use | Moderate to Low. Requires careful handling, ventilation, and extensive post-processing (washing and UV curing). |
| Print Quality | Exceptional (Invisible layer lines; perfect for models, miniatures, and high-detail jewelry). |
Why choose Resin? Only choose Resin if your primary goal is to print small, highly detailed items like miniatures or jewelry molds where aesthetic finish is paramount. Beginners should generally start with an FDM 3D Printer.
💻 The Digital Workflow: From Design to Print
Getting started with your 3D Printer requires understanding the digital steps that precede the physical print. This is often where beginners get confused.
Step 1: Find or Create a 3D Model (STL/3MF)
You need a digital blueprint, usually in the STL (Stereolithography) or 3MF format.
- Find Models: Websites like Thingiverse, MyMiniFactory, and Cults3D offer millions of free or paid models. You download the file and move to Step 2.
- Create Models: For true customization, you’ll need CAD (Computer-Aided Design) software. Tinkercad is the perfect web-based, beginner-friendly tool for simple designs, while Fusion 360 offers professional-grade features for free to hobbyists (Source: Delmarva Makerspace).
Step 2: Slicing the Model (The Crucial Step)
The 3D Printer cannot read an STL file directly. It needs specific instructions on how to move the nozzle and extruder, which are contained in a file called G-code. The process of converting the STL into G-code is called Slicing.
- Slicing Software: This program dissects your 3D model into thousands of horizontal layers, calculates the path for the print head, and allows you to set crucial parameters:
- Infill: The internal structure density (e.g., 20% for most parts).
- Supports: Temporary structures needed for printing “overhangs” (parts that hang in the air) (Source: Instructables).
- Layer Height: Determines print resolution (e.g., $0.2 \text{mm}$ is standard).
- Recommended Beginner Slicers:
- UltiMaker Cura: The long-standing, open-source champion with a massive community and plugin library (Source: All3DP).
- PrusaSlicer / Bambu Studio: Excellent, constantly updated slicers that integrate seamlessly with their respective printer brands, often featuring highly optimized, pre-set profiles.
Step 3: Printing and Monitoring
The slicer generates the G-code file, which you transfer to your 3D Printer via an SD card, USB stick, or Wi-Fi (if supported). Once initiated, the printer takes over. Always monitor the first few layers to ensure proper adhesion to the build plate. A print failure at the beginning can often be corrected, but an unattended failure can result in a massive tangle of plastic, known as a “spaghetti monster.”
🥇 Quick Start: Essential Beginner Gear & Tips
To ensure a smooth start, focus on a few key, high-quality tools and consumables.
Must-Have Starter Materials
- Filament (PLA): Start with PLA (Polylactic Acid). It’s the easiest to print with, requires low temperatures, smells faintly of sugar when melted, and warps minimally. Buy a reputable brand to avoid headaches.
- Bed Adhesion: Even with a great heated bed, a simple glue stick (PVA-based) or a can of hairspray can dramatically improve the print’s stickiness, preventing failures due to warping.
- Tools:
- Scraper/Spatula: For removing finished prints from the build plate.
- Flush Cutters: To clip excess filament and cleanly remove supports.
- Calipers (Digital): Essential for accurately measuring parts you want to replicate or ensuring your printed part is the correct size.
- Isopropanol Alcohol (IPA): Used to clean the print bed before printing.
Essential First-Print Tips
- Level the Bed: This is the most critical step. Modern printers like the Bambu Lab A1 Mini have auto-bed leveling, which handles this automatically. For manual systems (like older Ender models), a perfectly leveled bed ensures the first layer sticks evenly.
- Start with the Basics: Don’t try to print a complex, 10-hour model immediately. Print simple calibration cubes or the famous 3DBenchy boat—a miniature tugboat specifically designed to test all aspects of your 3D Printer‘s performance.
- Filament Storage: Filament absorbs moisture from the air (hygroscopic), which leads to popping sounds, poor adhesion, and weak prints. Store filament in a dry box with desiccant packs. A dry filament is a happy filament! You can find excellent storage and drying solutions at external expert sites like MakerBot or All3DP (Source: All3DP).
Conclusion: Embrace the Learning Curve
Getting started with a 3D Printer is an investment in a new skill and a new way of interacting with the physical world. While there is a learning curve—you will have failed prints, and you will need to troubleshoot—the rewards of turning an idea into reality are immense.
Modern printers are more user-friendly and reliable than ever, offering features like auto-leveling and pre-set material profiles that significantly smooth the beginner’s journey. By sticking to FDM, starting with PLA, and mastering your slicing software, you’ll be printing custom gadgets and repair parts for your home in no time. Welcome to the world of making!